|
Cameras
|
 |
|
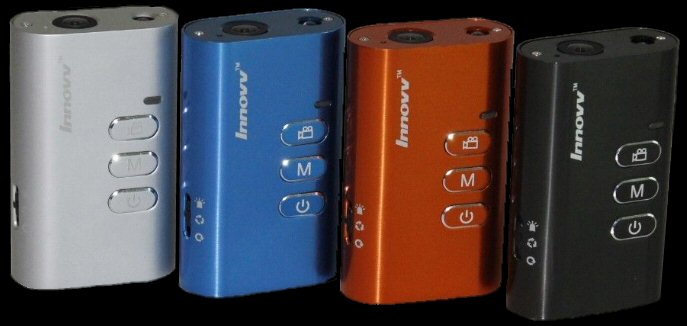
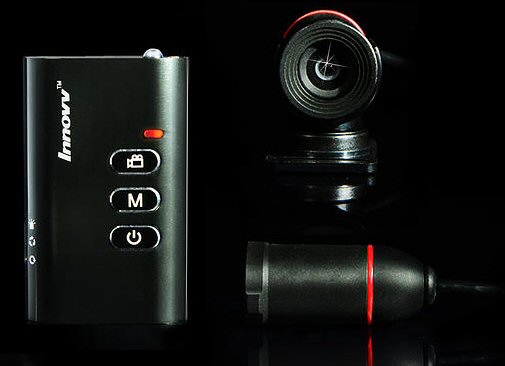
1080/720P HD Action Camera - Innovv C1
|
|
| Specifications | |
| Camera Specs | |
| Basic Operation | |
|
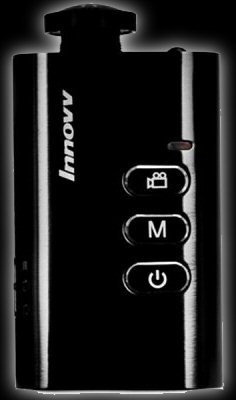
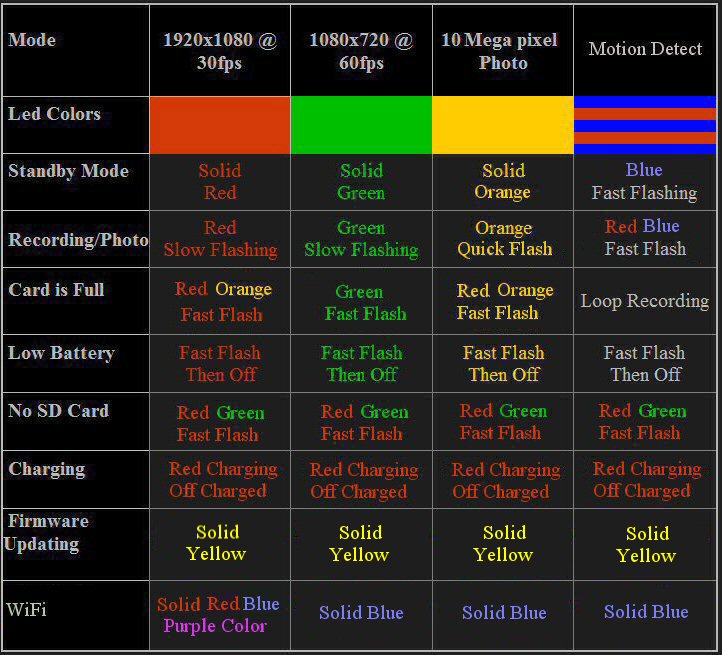
Power Button: Shutter Button: Mode Button: To continue recording in
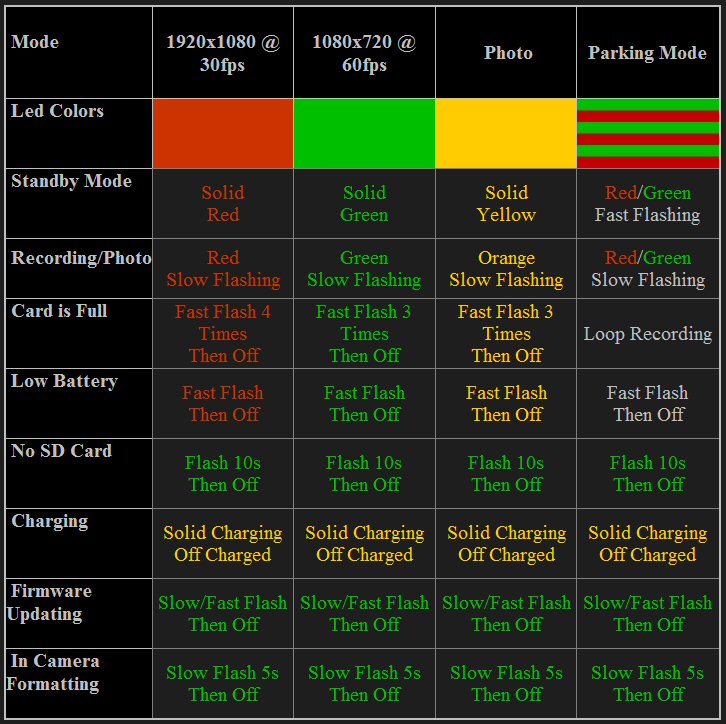
selected modes or take a picture press the shutter button. See mode colors shown below. |
|
| Pictures and Videos | |
| All media files will be saved to the "VIDEO/PICTURES folder on the camera drive. Right click any of the media files you created in the folder for options like Cut, Copy, Paste, Delete. What I do is highlight all media (or edit, select all), cut and paste them to a folder on my pc, this removes them off camera SD card and saves them to pc. | |
| Charging | |
| USB takes about 2 hours 20 minutes to fully charge if the battery is completely empty. When charging the yellow led will remain solid, when fully charged the red led will shut off. | |
| TV Out | |
|
Using the Audio/Video
cable connect camera to TV or Monitor. The RED and YELLOW cable leads plug
into matching RED (audio) and YELLOW (video) video inputs on TV. To stop a recording press the shutter button. In standby mode (solid led) you can press the mode button to cycle thru modes. 1080P 30fps (Red led)
720P 60fps (Green led)
Photo mode (Orange led)
Media playback (Orange led)
|
|
| Movie Maker 6 for Win 7 | |
|
Windows
live movie maker that shipped with windows 7 is more of a down graded movie maker
6. For those who want the better movie maker 6 for win7 -64 bit edition you
can download it
here, download also includes K-lite codec pack 64 bit. See how to:
video
PIP Using Movie
Maker 6 |
|
| SD Cards | |
|
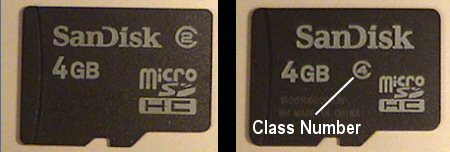
SD cards range from 2-32 GB. The cards used are the Micro SD/TF/SDHC with storage space 4GB/8GB/16GB/32GB. Tip: TF = TransFlash, SDHC = Secure Digital High Capacity. Your local computer store may sell these cards but you will probably find them cheaper online. The higher the class number (2, 4, 6...) the faster the read/write speed. Transcend, Kinston, and SanDisk are popular brands. Class numbers will be circled, see pic below.
Class is the rate in
which data flows to and from the card. When inserting
the SD card the brass pins on card will face towards top of camera. |
|
| Configuration | |
| Basic Settings and How They Work here | |
| In Camera Formatting | |
|
With camera off or
using USB in charging
mode press and hold both power and shutter buttons together until the green led
starts to flash, when format has completed (about 5 seconds) the camera will
shut off. Note: This will completely erase everything on SD card. |
|
| WebCam Mode | |
| Plug in USB and turn camera off (charging mode) if this is the first time using webcam mode drivers will load. If you dont have the Amcap program you can download it here. Open "Amcap.exe" to view the live capture from camera.. | |
| Original Manual | |
|
PDF Manual Trouble Shooting |
|
| Firmware | |
|
Last firmware update C1-C2 Firmware March 13 2014 |
|
| Configuration Software | |
|
Windows software to configure
settings using USB connection. Ez_Configuration |
|
| Inside the Innovv C1 HD 1080P | |
| Take a closer look at the internal parts of the Innovv C1 HD 1080P | |
| Pros / Cons | |
|
Pros: Stylish design. Sharp clear videos and pictures. Very bright integrated flashlight. Using the configuration utility (GUI) you can create your own settings. You can also view videos and pictures directly from camera to tv using A/V cable. Cons:
Switch on side hard get at as it sits slightly inside the case. Sometimes
videos of sky get a slight blue tint.
This is what the time stamp looks like on the Innovv C1 HD cam.
|
|
|
1080/720P
HD Action Camera -
Innovv C2
|
|
| Ebay Stores | |
| Beetleonline Eletech086 Power-gps Innovv Internet-shop365 Powerdigital898 | |
| Specifications | |
| Camera Specs | |
| Basic Operation | |
|
Power Button: Shutter Button: Mode Button: To continue recording in
selected modes or take a picture press the shutter button. See mode colors shown below. |
|
| In Camera Formatting | |
|
With camera off or
using USB in charging
mode press and hold both power and shutter buttons together until the green led
starts to flash, when format has completed (about 5 seconds) the camera will
shut off. Note: This will completely erase everything on SD card. |
|
| Configuration | |
| Basic Settings and How They Work here | |
| WebCam Mode | |
|
emove SD card.
With USB connected (charging mode) press and HOLD shutter button then press
the power button, wait about 10 seconds before releasing shutter. If this is
the first time using web cam mode drivers will automatically download to
your PC. After drivers have installed (Repeat) In charging mode press both
power and shutter buttons again to start web cam mode. Open your favorite
web cam software such as
AMCap to view the live video.
640x480 Note: Web cam mode and In Camera Formatting use the same buttons so dont forget to remove SD card. |
|
| Charging | |
| USB takes about 2 hours 30 minutes to fully charge if the battery is completely empty. When charging the yellow led will remain solid, when fully charged the led will shut off. | |
| TV Out | |
|
Using the Audio/Video
cable connect camera to TV or Monitor. The RED and YELLOW cable leads plug
into matching RED (audio) and YELLOW (video) video inputs on TV. To stop a recording press the shutter button. In standby mode (solid led) you can press the mode button to cycle thru modes. 1080P 30fps (Red led)
720P 60fps (Green led)
Photo mode (Orange led)
Media playback (Orange led)
|
|
| Firmware | |
| C2 Firmware March 13 2014 | |
| Original Manual | |
| PDF Manual | |
| Configuration Software | |
|
Windows software to configure
settings using USB connection. Can also be used to download and install latest firmware. Ez_Configuration |
|
| Pros / Cons | |
|
Pros: Stylish design. Sharp clear videos and pictures. Very bright integrated flashlight. Using the configuration utility (GUI) you can create your own settings. You can also view videos and pictures directly from camera to tv using A/V cable. Cons:
Switch on side hard get at as it sits slightly inside the case. Sometimes
videos of sky get a slight blue tint.
This is what the time stamp looks like on the Innovv C2 HD cam.
|
|
|
1080/720P
HD Action Camera -
Innovv C3 Snake Cam
|
|
| Ebay Stores | |
| Beetleonline Eletech086 Power-gps Innovv Internet-shop365 Powerdigital898 | |
| Specifications | |
| Camera Specs | |
| Basic Operation | |
|
Power Button: Shutter Button: Mode Button: To continue recording in
selected modes or take a picture press the shutter button. See mode colors shown below. |
|
| In Camera Formatting | |
|
With camera off or
using USB in charging
mode press and hold both power and shutter buttons together until the green led
starts to flash, when format has completed (about 5 seconds) the camera will
shut off. Note: This will completely erase everything on SD card. |
|
| Configuration | |
| Basic Settings and How They Work here | |
| WebCam Mode | |
|
Remove SD card. With USB connected
(charging mode) press and HOLD shutter button then press the power
button, wait about 10 seconds before releasing shutter. If this is
the first time using web cam mode drivers will automatically download
to your PC. After drivers have installed (Repeat) In charging mode
press both power and shutter buttons again to start web cam mode. Open
your favorite web cam software such as
AMCap to view the live video.
640x480 Note: Web cam mode and In Camera Formatting use the same buttons so dont forget to remove SD card. |
|
| Charging | |
| USB takes about 2 hours 30 minutes to fully charge if the battery is completely empty. When charging the yellow led will remain solid, when fully charged the led will shut off. | |
| TV Out | |
|
Using the Audio/Video
cable connect camera to TV or Monitor. The RED and YELLOW cable leads plug
into matching RED (audio) and YELLOW (video) video inputs on TV. To stop a recording press the shutter button. In standby mode (solid led) you can press the mode button to cycle thru modes. 1080P 30fps (Red led)
720P 60fps (Green led)
Photo mode (Orange led)
Media playback (Orange led)
|
|
| Firmware C3 | |
| C3 Firmware December 11 2014 | |
| Original Manual | |
| PDF Manual | |
| Configuration Software | |
|
Windows software to configure
settings using USB connection. Can also be used to download and install latest firmware. Ez_Configuration |
|
| Pros / Cons | |
|
Pros: Stylish design. Sharp clear videos and pictures. Very bright integrated flashlight. Using the configuration utility (GUI) you can create your own settings. You can also view videos and pictures directly from camera to tv using A/V cable. Cons:
Mounting brackets fit lens very tight, making it hard to insert or remove lens.
Finding the top side of lens should be marked more clearly. Lens must be
also be connected in order to download recorded media to pc, without lens
connected camera can only be charged.
This is what the time stamp looks like on the Innovv C3 HD cam.
|
|
|
1080/720P
HD Action Camera -
Innovv C4 WiFi Pre-released, Updating
|
|
|
Ebay Stores |
|
| Beetleonline Eletech086 Power-gps Innovv Internet-shop365 Powerdigital898 | |
| Specifications | |
| Camera Specs | |
| Basic Operation | |
|
Power Button: Shutter Button: Mode Button: To continue recording in
selected modes or take a picture press the shutter button. |
|
| In Camera Formatting | |
|
Using any (solid color
led) press and hold the shutter button for 10 seconds. Note: This will erase everything on SD card. |
|
| WiFi Configuration | |
|
Turn camera On and
press the shutter button to enter standby mode (solid led) Press and hold the mode button on camera. A solid blue/red (purple) means the camera is now in Wifi mode. Open settings on phone or tablet and check for connection to camera called "Action DVR" Select Action DVR and type the password "00000000" which is default unless changed. Now connected thru WiFi you can use the free app called "IsmartDV" to operate camera. WiFi range up to 30 feet. |
|
| WebCam Mode | |
|
Note: You will need to download and install the
web cam drivers and the latest
firmware below to use web cam. Plug in USB to start camera (bright red led). Press and hold mode button for 3 seconds. Open your favorite web cam software such as AMCap to view the live video. 640x480 |
|
| Charging | |
|
USB takes about 2 hours 20 minutes
to fully charge if the battery is completely empty. When charging the
dim red led will remain solid, when fully charged the red led will shut
off.
Note: There is a bright red led and a dim red led. The bright red led is data transfer mode. The dim red led is charging mode. With USB connected press the power button 3 seconds to change modes. The battery still charges in data transfer mode but the bright red led does not shut off when charge is complete, only the dim red led will shut off when charge is complete. |
|
| TV Out | |
| Using the Audio/Video cable connect camera to TV or Monitor. The RED and YELLOW cable leads plug into matching RED (audio) and YELLOW (video) video inputs on TV. | |
| Firmware | |
|
C4 Firmware March 9 2015 C4 Firmware March 24 2015 |
|
| Original Manual | |
|
Manual Fix C4 Bricked Camera |
|
| Assemble-Disassemble | |
| How-To Video | |
| Configuration Software | |
|
Windows software to configure
settings using USB connection. Ez_Configuration |
|
| Pros / Cons | |
|
Pros: Unknown Cons:
Unknown
This is what the time stamp looks like on the Innovv C4 HD cam.
|
|
